Matter is the common language of smart homes: the systems of Google, Amazon, Apple and Samsung all understand it. With the myIO Matter connection, the lights, blinds, heating zones and thermometers of your house appear in these apps too, next to your other devices, and you can control them from there.
The connection is a free plugin for Matterbridge, an open-source program. Matterbridge runs on a small, always-on computer in the house and acts as a bridge between myIO and the Matter apps. Nothing has to be changed or updated on myIO for this, and no internet is needed: everything happens inside the house.
This is a beta. We tested the connection with Google Home, Amazon Alexa and Home Assistant, paired with all three at the same time. Matterbridge can also be paired with Apple Home (HomeKit) and SmartThings, but we have not tried the myIO plugin there yet. If you do, tell us how it went.
What do you need?
- A myIO on your home network: V4 GIGA, V4 Opta or V3. The V3 needs software 3.12 or newer.
- A computer that is always on, on the same network: a Raspberry Pi, a NAS, a mini PC, or the machine your Home Assistant runs on. Matterbridge will run on it. It does not have to be powerful: according to the Matterbridge documentation, 512 MB of memory is enough.
- The hub of your app, if you use Google Home, Alexa or Apple Home: a Nest speaker, Nest display or Google TV; an Echo; a HomePod or Apple TV. Home Assistant needs no separate hub.
- Your phone with the app, on the same Wi‑Fi.
The whole thing takes about half an hour. You only type commands when installing Matterbridge; everything else is done in a browser. If this is unfamiliar ground, ask your electrician or a friend who knows computers, or ask an AI assistant for help.
1. Install Matterbridge
Matterbridge is free, open-source software. Its own site describes the installation in detail: matterbridge.io. The three most common ways:
-
Raspberry Pi or another Linux machine: install Node.js 24 (LTS), then run these two commands:
sudo npm install -g matterbridge --omit=dev
matterbridge
To have it start on its own after a reboot, set it up as a service: Matterbridge instructions.
-
Docker (on a NAS or a Linux server): the
luligu/matterbridgeimage, in “host” network mode: Matterbridge instructions. Docker Desktop on Windows and Mac has no such network mode, so install it directly there. -
Home Assistant OS: with the official Matterbridge add-on: add-on instructions.
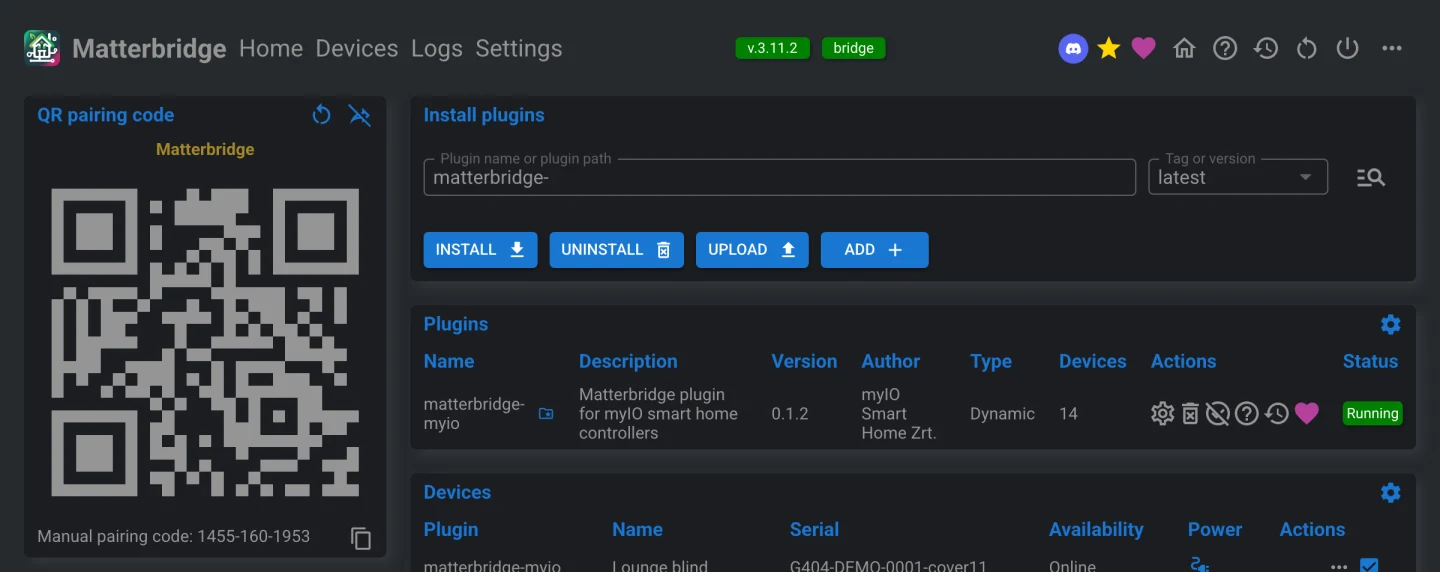
Once it runs, open its interface in a browser at http://<address of the machine>:8283.
2. Install the myIO plugin
- Open the Matterbridge interface.
- On the Home page, type
matterbridge-myiointo the field of the Install plugins box and press Install. - When the installation is done, restart Matterbridge with the Restart matterbridge icon in the header (the circular arrow).
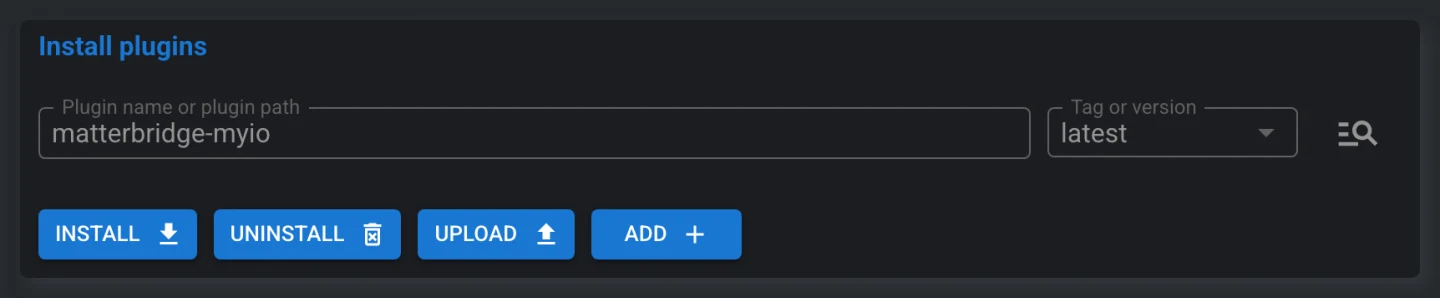
The plugin is installed from the public npm registry: matterbridge-myio.
3. Create a separate user on myIO
The plugin sees exactly what its myIO user sees, and can switch only what that user may switch. So it is worth creating a separate user for it, for example matter, with rights only for what you want to see in Google Home, Alexa or the Home app. This is the easy way to leave out the boiler, the gate or the alarm output.
- You add the user on the Users page of the myIO web interface. The steps are in chapter 22 of the myIO manual.
- For a blind, give write permission for the outputs of both directions; for a colour LED strip, for all three colour channels. Otherwise they do not come together as one device.
- Only named outputs appear, with the name you gave them on myIO.
4. Give the plugin your myIO
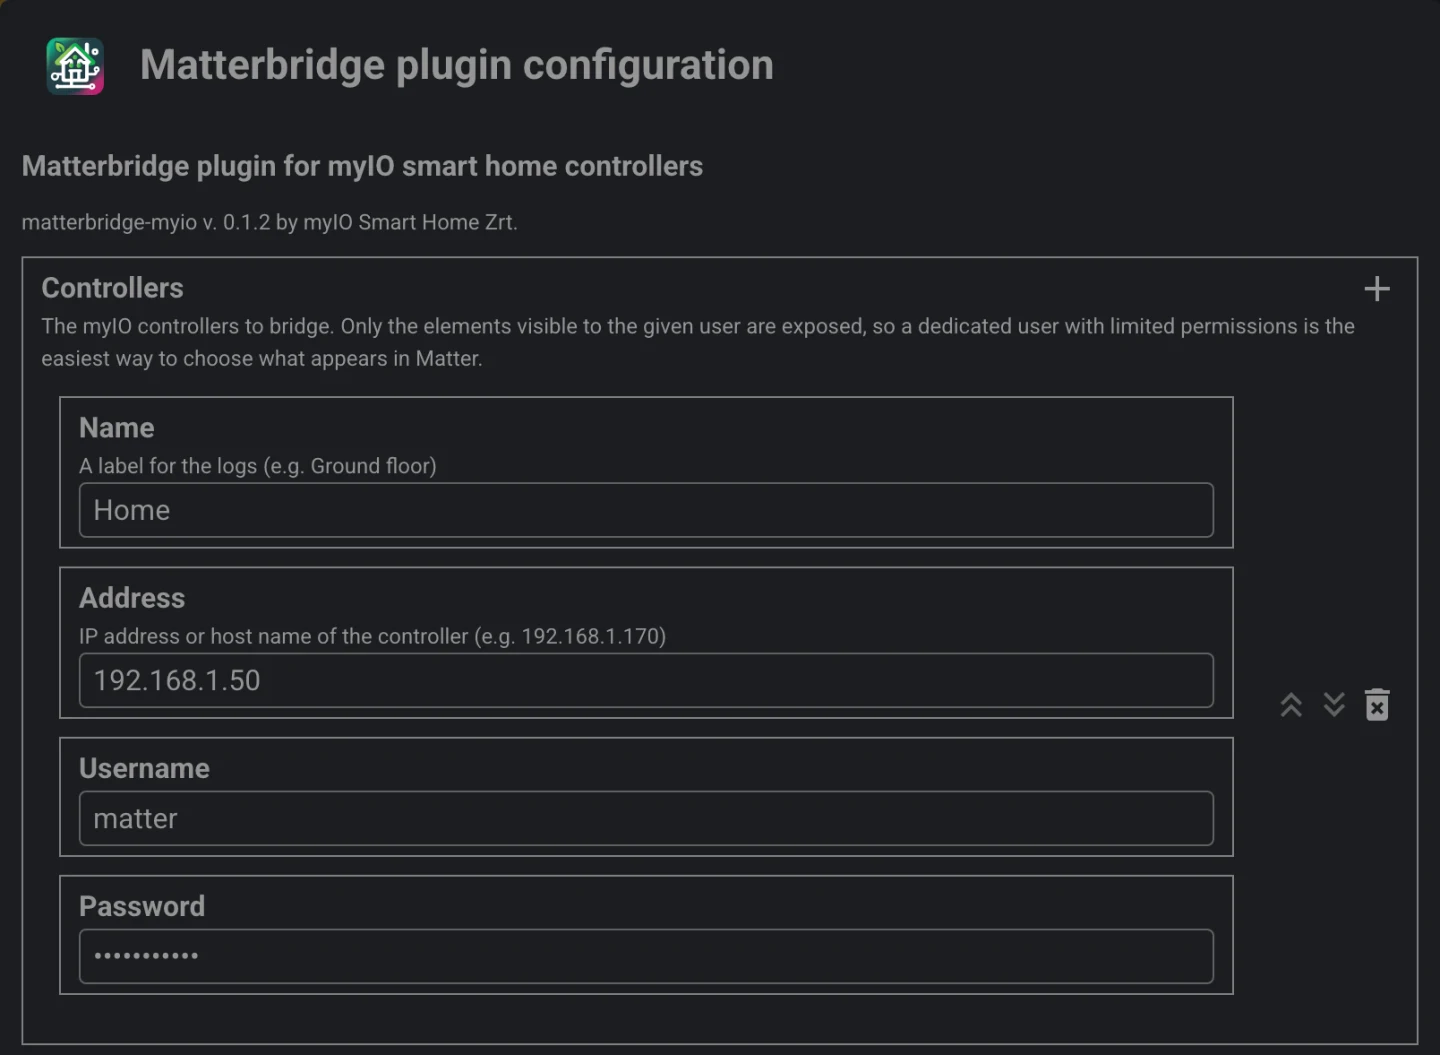
- On the Matterbridge Home page, click the gear icon in the row of
matterbridge-myio. - Under Controllers, add a row and fill it in:
- Name: any name, for example “House” or “Ground floor”;
- Address: the address of myIO on the network, for example
192.168.1.170; - Username and Password: the name and password of the user you have just created.
- Save with the Confirm button, and restart Matterbridge.

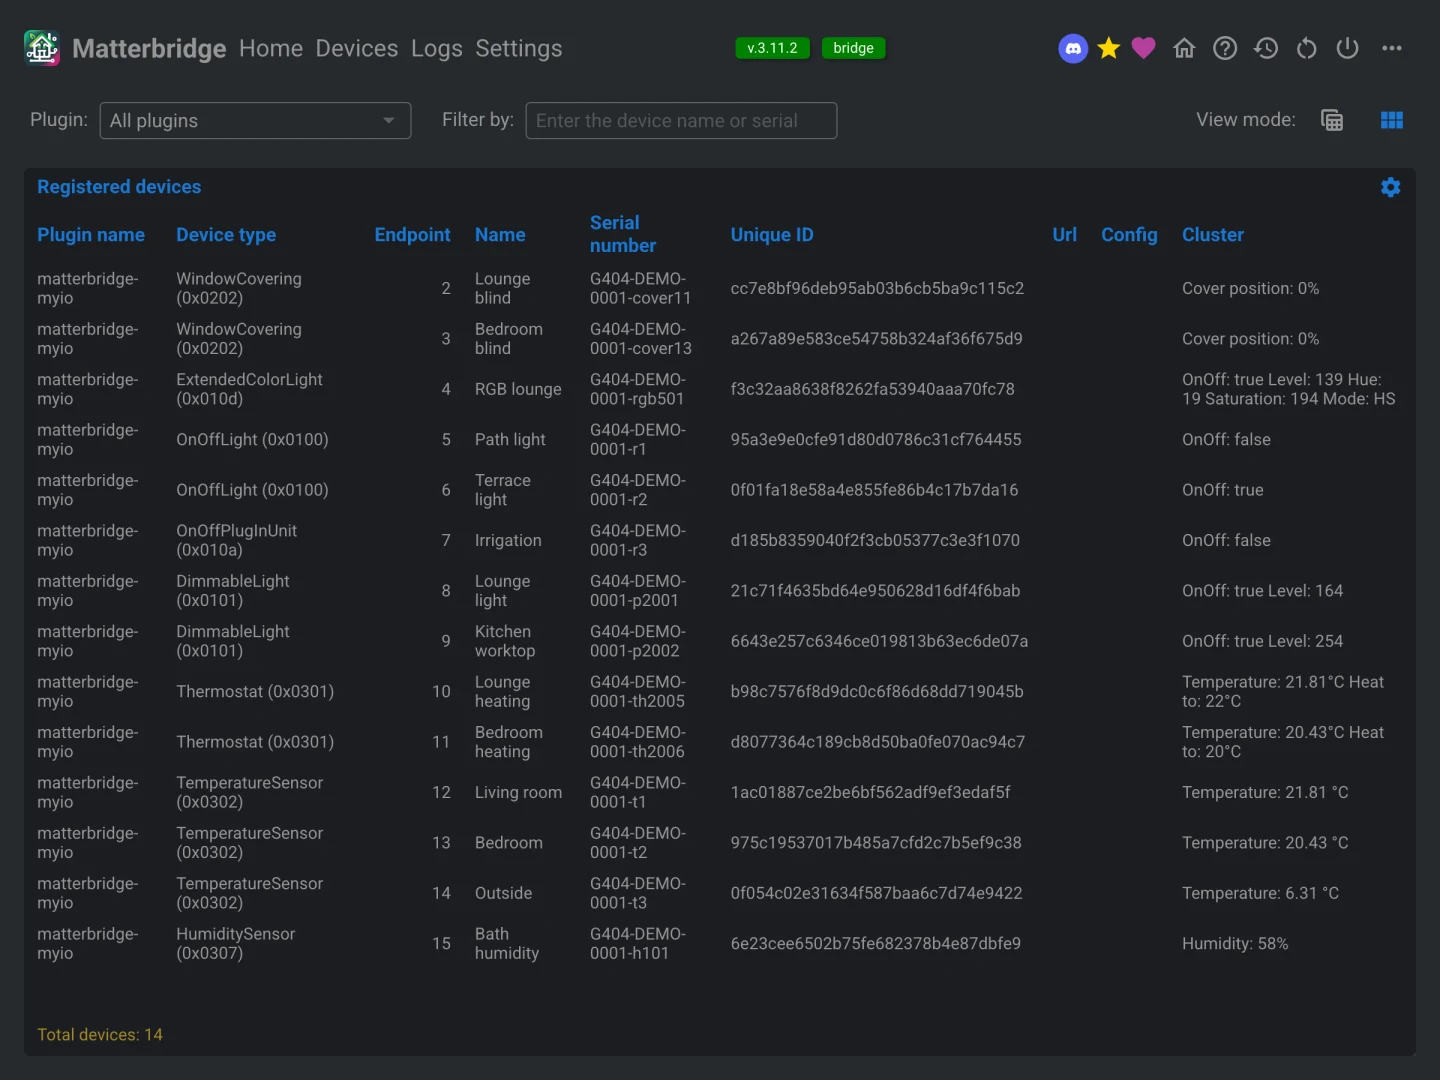
After the restart, the myIO devices appear on the Devices page.
If there are several myIO controllers in the house, add each one in its own row: one bridge carries them all. If you do not know the address of your myIO, the service display in the cabinet shows it.
5. Pair it with your app
The bridge is paired once, like a single Matter device: all myIO devices arrive with it. The pairing QR code and the numeric code are on the Matterbridge Home page.
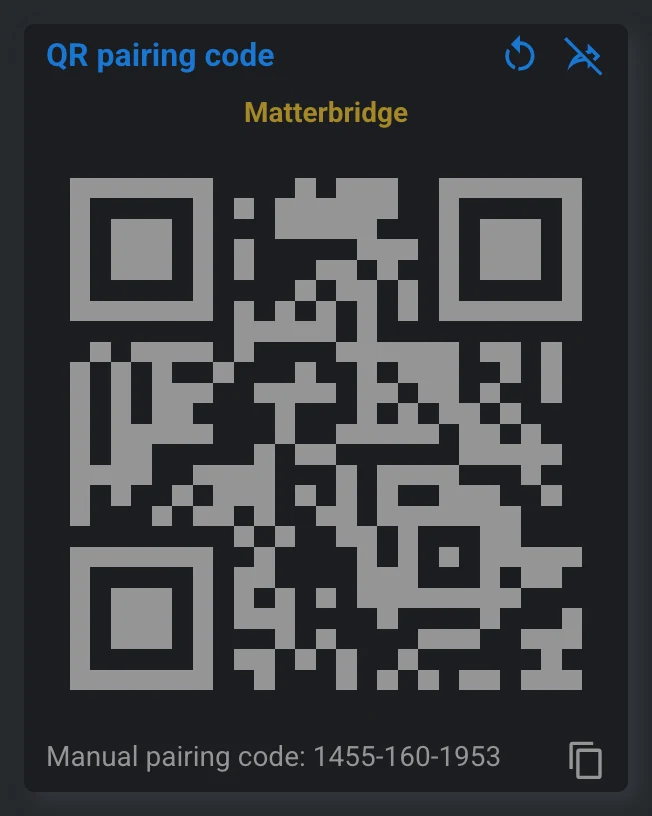
The phone, the hub of the app and the Matterbridge machine must be on the same network. Devices on a guest network or on a separate network segment do not find each other.
Matterbridge is open-source software, not a certified Matter product. Home Assistant accepts it anyway, Apple Home warns but lets you continue, and Google Home needs a one-time setup first. It is described below.
Home Assistant
- In Home Assistant open: Settings → Devices & services → Devices → Add device → Add Matter device.
- In the Home Assistant phone app choose “No. It’s new.” and scan the QR code. In a browser choose “Yes. It’s already in use.”, then “Other controllers”, and enter the numeric code shown on the Matterbridge Home page.
The Matter integration of Home Assistant must already be working for this.
Google Home
Google accepts an uncertified bridge only if your Google account has a developer project for it. You set this up once:
- Open the Google Home Developer Console with the same Google account that Google Home uses on your phone.
- Create a project (Create project) and give it a name, for example “myIO”.
- Choose Add Matter integration. Enter a product name, pick a device type (any will do), set Vendor ID to Test VID (
0xFFF1) and Product ID to0x8000. Save. - Restart your Google hub (the Nest device or the Google TV) so that it receives the setting.
Then pair: in the Google Home app go to Devices → Add → Matter-enabled device, and scan the QR code.
Amazon Alexa
- Update the Echo: say “Alexa, check for software updates”. An older Echo Dot of ours did not find the bridge at all until it was updated.
- In the Alexa app: Devices → + → Add Device → Other → Matter, then scan the QR code or enter the numeric code.
Alexa handles at most 50 devices from one bridge, and shows the blind percentage the other way round than the other apps.
Apple Home
In the Home app, under + → Add Accessory, scan the QR code. The app says the accessory is not certified; it still lets you add it. We have not tried this pairing ourselves yet.
Several apps at once
The bridge can be paired with several apps at the same time. After the first pairing the QR code disappears from the Home page. For the next app, press Turn on pairing in the Paired fabrics box: the QR code and the unchanged numeric code work again for about a quarter of an hour.
What appears in the app?
| On myIO | In the app | Good to know |
|---|---|---|
| switched output | plug or light | it becomes a light if its name contains a light word, such as light, lamp or LED (or the Hungarian lámpa, világítás, fény, csillár, spot) |
| dimmable output | light with a brightness slider | switching on returns to the last brightness |
| roller blind, venetian blind (up and down outputs) | blind | open, close, stop, go to a percentage |
| output controlled by a thermometer | thermostat | measured and target temperature, for heating or cooling |
| colour LED strip | colour light | colour and brightness |
| thermometer, humidity sensor | temperature and humidity sensor |
Parts of a composite device do not appear separately: instead of the two outputs of a blind or the three colour channels of an LED strip you see a single device. Wall buttons, mixing valves and energy meters are not carried over in this version.
Good to know
- It works both ways. What you switch with a wall button, a timer or the myIO App shows up in the app about a second later.
- The blind percentage is an estimate. myIO does not measure the position of a blind, so the bridge works it out from the running time. Enter the full travel time of your blinds (see Fine-tuning); every full run up or down makes it accurate again.
- A thermostat cannot be switched off from the app. The heating is controlled by myIO, and a zone has no “off” setting. If you want a break, set a low temperature.
- The names come from myIO. If you rename something on myIO or add a new element, the app follows within ten minutes at most. If two elements share a name, the second one gets its myIO ID after its name so that you can tell them apart.
- If myIO cannot be reached for a moment, its devices are shown as unavailable and come back on their own. Their rooms are kept.
- The house works the same without the bridge. If the Matterbridge machine stops, you only lose access to myIO from the Matter apps. The wall buttons, the timers, the heating and the myIO App carry on.
- The language of voice commands depends on your assistant. Voice control in Hungarian is offered by the myIO App, on Android.
Fine-tuning
You reach the plugin settings by clicking the gear icon. Restart Matterbridge after a change.
- What is a light and what is a plug? The words in the Light keywords list decide: a switched output whose name contains one of them appears as a light. With Relays appear as, all the others can be lights as well.
- Travel time of the blinds: Shutter travel time is the time of a full run in seconds (30 by default). If your blinds differ, set them one by one in the Travel time per shutter list.
- Filter by name: the White List lets through only the listed devices, the Black List leaves out the listed ones. Both can be picked from a list.
- Switching kinds of devices on and off: blinds, thermostats, colour lights and sensors can each be left out.
- Matterbridge’s own switches: Matterbridge also creates two switches of its own (Restart Matterbridge, Update Matterbridge), and they appear as devices in your app. If you do not want them, set Virtual devices to Disabled on the Matterbridge Settings page.
If something does not work
The phone does not find the bridge when pairing
- Check that the phone, the hub of the app and the Matterbridge machine are on the same network, and not on a guest network.
- If a firewall runs on the Matterbridge machine, allow Matterbridge through it.
- If the machine has more than one network connection (for example a VPN or Docker), type the name of the one facing your home network into the Mdns interface field on the Matterbridge Settings page.
- If the bridge is already paired with another app, turn pairing on again first (Turn on pairing).
Alexa does not find the device
Update the Echo (“Alexa, check for software updates”), wait until it restarts, turn pairing on again on the Matterbridge Home page, and try once more. An older Echo Dot of ours did not look for the bridge at all before the update; afterwards it worked the first time.
Google Home does not let me add the bridge
- Check that the developer project is in the same Google account that Google Home uses on your phone, and that the Vendor ID is
0xFFF1and the Product ID is0x8000. - After creating the project, restart the Google hub.
- According to the Matterbridge documentation, pairing from Android sometimes stops with a “Something went wrong” message. For us it worked from Android the first time; if it stops for you, pair from an iPhone, and the devices will then appear on the Android phone too.
There are no myIO devices on the Devices page
Look at the Matterbridge log (Logs). If it says the controller is “not reachable”, check the address of myIO, the username and the password in the plugin settings. After several wrong passwords myIO refuses logins from that machine for a while; in that case correct the password and wait a quarter of an hour.
A device is missing
- It has no name on myIO: only named outputs appear.
- The user of the plugin has no rights for it.
- It is part of a composite device: a blind, a colour LED strip or a thermostat.
- The white or the black list filters it out.
New and renamed elements appear within ten minutes at most, and immediately after Matterbridge is restarted.
A light shows up as a plug
Put the word “light” or “lamp” into its name on myIO, or add a word from its name to the Light keywords list of the plugin.
Not every device shows up in Alexa
Alexa handles at most 50 devices from one bridge. Narrow it down: give fewer rights to the user of the plugin, or use the white list.
A "Restart Matterbridge" and an "Update Matterbridge" switch appeared
These are Matterbridge’s own switches. Set Virtual devices to Disabled on the Matterbridge Settings page, and restart.
How do I remove it?
First delete the bridge from your app (the myIO devices disappear with it), then remove the plugin with the bin icon in its row on the Matterbridge Home page. Nothing changes on myIO; at most you can delete the user you created for it.
If it still does not work, you will find us on the Support page.
For professionals
- The plugin:
matterbridge-myioon npm, under the Apache-2.0 licence. It needs Matterbridge 3.11 or newer, on Node.js 22 or 24. - Connection to the controller: on the local network, over HTTP, with the given user, through the open API of myIO. The state is polled once a second by default (Poll interval; a V3 at most every 2 seconds), names and the set of elements are read again every 10 minutes (Rediscover interval). The controller software does not have to be touched: 3.12 on a V3, 4.x on a V4.
- Matter device types: On/Off Plug-in Unit or On/Off Light, Dimmable Light, Extended Color Light, Window Covering, Thermostat, Temperature, Humidity, Light and Pressure Sensor; all as bridged devices on one Matter bridge.
- Blind: made from a lockout pair. For a target in between (for example 30 %) the bridge stops it on a timer; at the end positions the timer of the controller or the limit switch of the motor stops it. When the direction is reversed while moving, it stops first and waits 0.6 seconds.
- Thermostat: the target is the middle of the switch-on and switch-off thresholds; changing the target moves both thresholds and keeps the band between them. Whether it is heating or cooling is decided by the order of the thresholds.
- Dimmer: the slider covers the range between the MIN and MAX values of the output. Colour light: a group whose name starts with “RGB”, with dimmable outputs whose names start with R, G and B as members.
- Universal sensors (V4): the temperature, humidity, illuminance and pressure types appear, and they need a user of editor level. They cannot be handed out with the per-element rights of a user-level account.
- Groups as switches (Groups) and unnamed outputs (Expose unnamed outputs) can be switched on separately.
- The identity of a device is formed from the serial number of the controller and the ID of the element: neither renaming the controller nor a change of its address creates new devices. If the bridge starts while the controller cannot be reached, it loads the last device list marked as unavailable, so the app does not delete the devices.
- After a command, the device ignores the polled state for 2.5 seconds (fading brightness, delayed output). If the controller did not carry out the command, the app falls back too.
- Network: Matter uses IPv6 and mDNS on the local network (UDP 5540 and 5353). IPv6 is not needed towards the internet.
- Matterbridge runs with the Matter test vendor code (Vendor ID
0xFFF1, Product ID0x8000); this is why Google Home needs a developer project. - myIO itself is not a Matter device: on the Matter network it is represented by Matterbridge.